A SOLID 14 person table - Design and build
- The Most Versatile HandyMan
- Mar 16, 2023
- 10 min read
Updated: Sep 7, 2023
What do you do when you can't find what you want through the regular distribution channels? You have to contact somebody to make it per your requirements or you make it yourself. I decided to take the latter option :-)
This is a project I made in late 2019. At that time I never thought I would ever write a blog about it so I don't have detailed pictures of all the production steps.
When starting to design something it is always best to first list your requirements and expectations. During the design process it is easy to get carried away. Having those initial requirements makes it easier to check if your solution really covers your needs and get back with your feet on the ground.
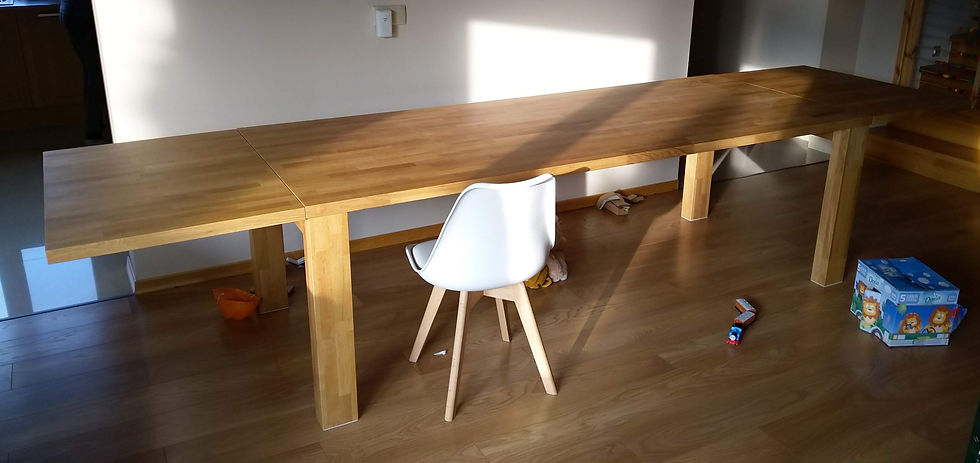
What did we want for our dining table? It was going to be the focal point of our daily family life so it had to offer a lot of space and comfort. So, first of all I wanted it to be solid and I mean, really SOLID. Secondly it had to be easy in daily use and cleaning. A plain table top, no special edges, no protruding legs, no crevices. Thirdly it needed to look straightforward, I wanted it to shine by its simplicity. Fourthly it was going to be a table for now to eternity so I preferred massive wood so it could be resanded when needed and treated again. Lastly, we wanted it to sit up to 10 persons in its 'daily' mode and 14 persons when extended.
Now that we know the requirements, the design process can start. I will save you all the different iterations this table went through and present you the outcome. After some real life testing we decided that we wanted 60cm seating space per person. If we made the table 100cm wide, it would allow for a person to also comfortably sit at the head of the table. So in order to sit 10 people comfortably, the table needed to be 240cm long and 100cm wide. In it's extended mode 2 extensions of 60cm would need to be added. For the height we checked with existing tables that 78cm was good.
As we wanted a flat tabletop without crevices any extensions would need to be added on the extremities when required an not in the middle of an opening table top.
I had come up with a design where the table extensions would be hidden in drawers at each head of the table. These same drawers would then serve as supports for these extensions once installed. The system looked really handy and allowed for the complete table to be in 'one' place. Extending it was going to be a piece of cake. This table would need some aprons and skirts at the sides in order to hide the drawers for the extensions.
Although it looked like a very nice table, I wasn't happy with it. It took some time to discover why I wasn't satisfied with this design but finally I realized that it wasn't simple enough.
KISS !! A top and 4 legs! More isn't needed to make a table. Here I was adding extensions, drawers and skirts because a few times a year we wanted to sit more people. I was penalizing day to day usage in order to facilitate the occasional extension.
Back to basics: Only A top and 4 legs. The two extensions would be stored in a storage space under the stairs.
I really liked the following concept: https://woodweb.com/cgi-bin/forums/furniture.pl?read=752449


The table top in this design is 70mm thick. I wanted something sleeker looking and decided that a 40mm top would still be sufficiently strong without needing a table frame below it in support. But with a 40mm thick top the above idea for fixing the legs would lose much of its strength... And how was I going to mount the extensions to this table? I also made a quick estimation of the weight of the table with a 40mm table top and estimated it somewhere around 110kg. I considered this to be too heavy to handle comfortably when making it. Moving it around finished, considering dimensions and weight, would be hell. The top alone would weigh around 70kg but would be a simple board so quite a lot easier to handle.
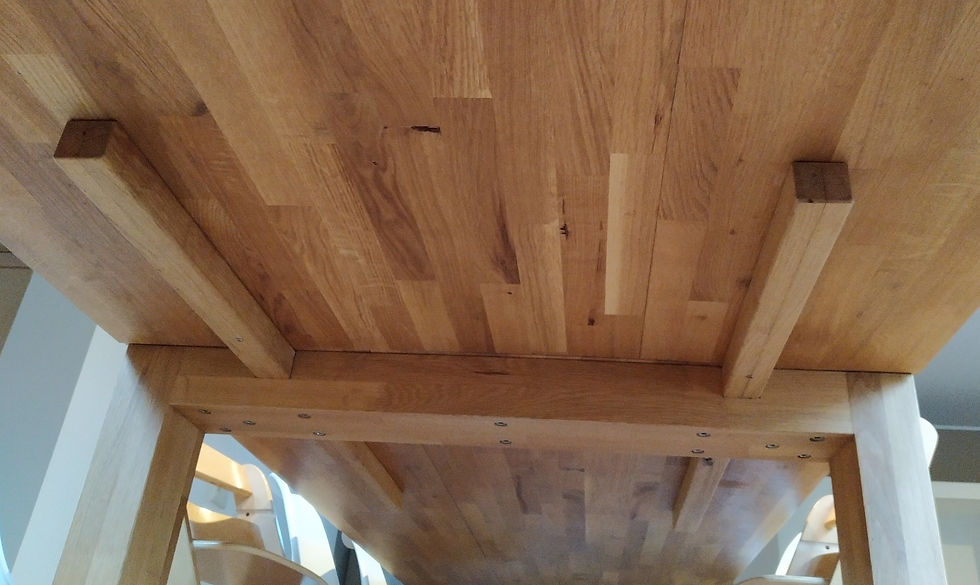
Putting two and two together I decided to make the legs detachable and mount them as an inverse U under the table ends. I could take a horizontal beam sufficiently thick to assure a solid connection of the legs to it. The beam would also be able to support arms for the table extensions.
For the material I had already kind of decided that I liked the look of oak panels made out of glued staves. I think they look more modern then panels glued up of full boards and I expect them to be more stable in the long run.
I didn't really want to glue up the top myself. It seemed like lot of repetitive work.... But I couldn't find a glued top of that dimensions until I accidentally came across 2 very well priced kitchen tops (400x65x4cm) at a bankruptcy sell-off auction. I didn't hesitate.

So now I had 2 tops 400x65x4cm as raw material for my table. Legs with a dimension of 12x8 cm would look nice proportionally to the rest of the table and it would be quite easy to make them when gluing the 4cm boards together. For the horizontal part of the upside down U I also considered the same 12x8cm beam.
A sketch showed that the two tops I purchased would provide just enough material for the table top, the extensions, the legs and still allow for some sawing losses. The pieces of the puzzle seemed to fit nicely together. To support the extensions I would be able to make some beams out of an old table frame which was sold together with the tops.

I cut all the main pieces roughly to size with a circular saw and straight edge planning on straitening them up later on. (I didn't have a track saw.)
First I glued the parts for the table top and extensions together. Before gluing, I straightened out the two joining edges with a plane. I must admit it was the first time I used a plane and it took quite a while to get to a satisfactory result.


While those were drying, I was considering how I could assemble the 'U's for the table legs. I didn't want any screws or joints to be visible and I wanted them to be really solid. I decided that my best option would be a lapped tooth and groove connection. I made various sketches to get a better feel and to decide how I would execute the joint:

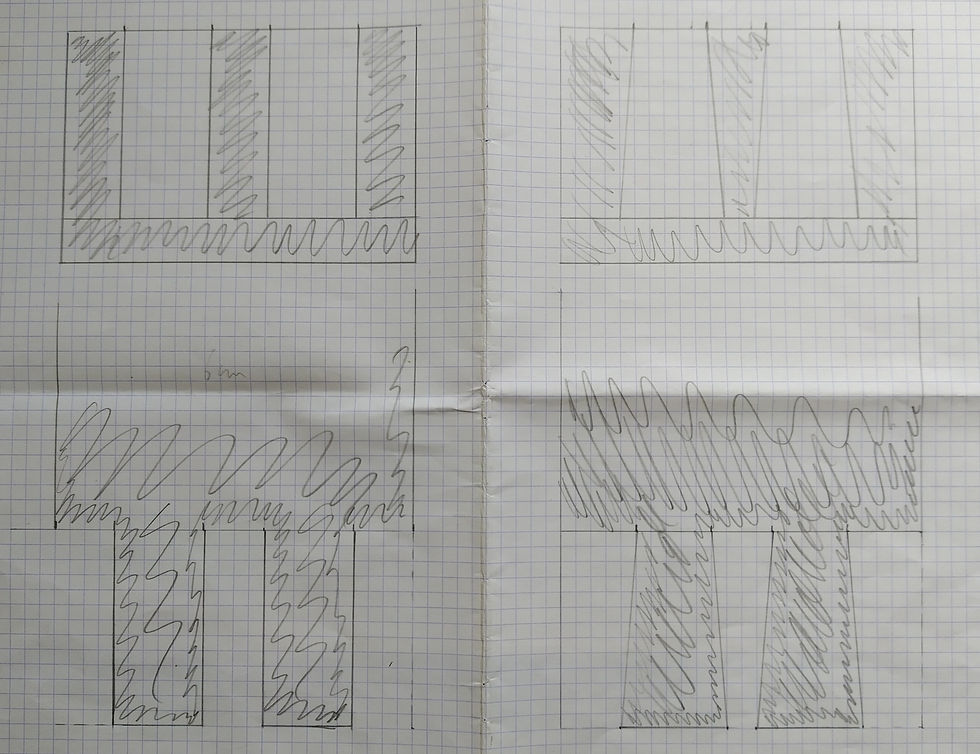


After giving various options some thought I decided to go for a straight lapped triple tooth and groove connection. Having never done anything like this before I first made a test bridle joint out of some pine.
The videos of Paul Sellers have been a great help for me in learning the needed techniques for making this lapped bridle joint: https://paulsellers.com/

Once the assembly method for the legs was clear I glued all the boards for the legs and beams together and cut them to size.
Afterwards I took to the most strenuous part: making the teeth and grooves. For the grooves I could only partially saw them so a lot of chiseling was required.


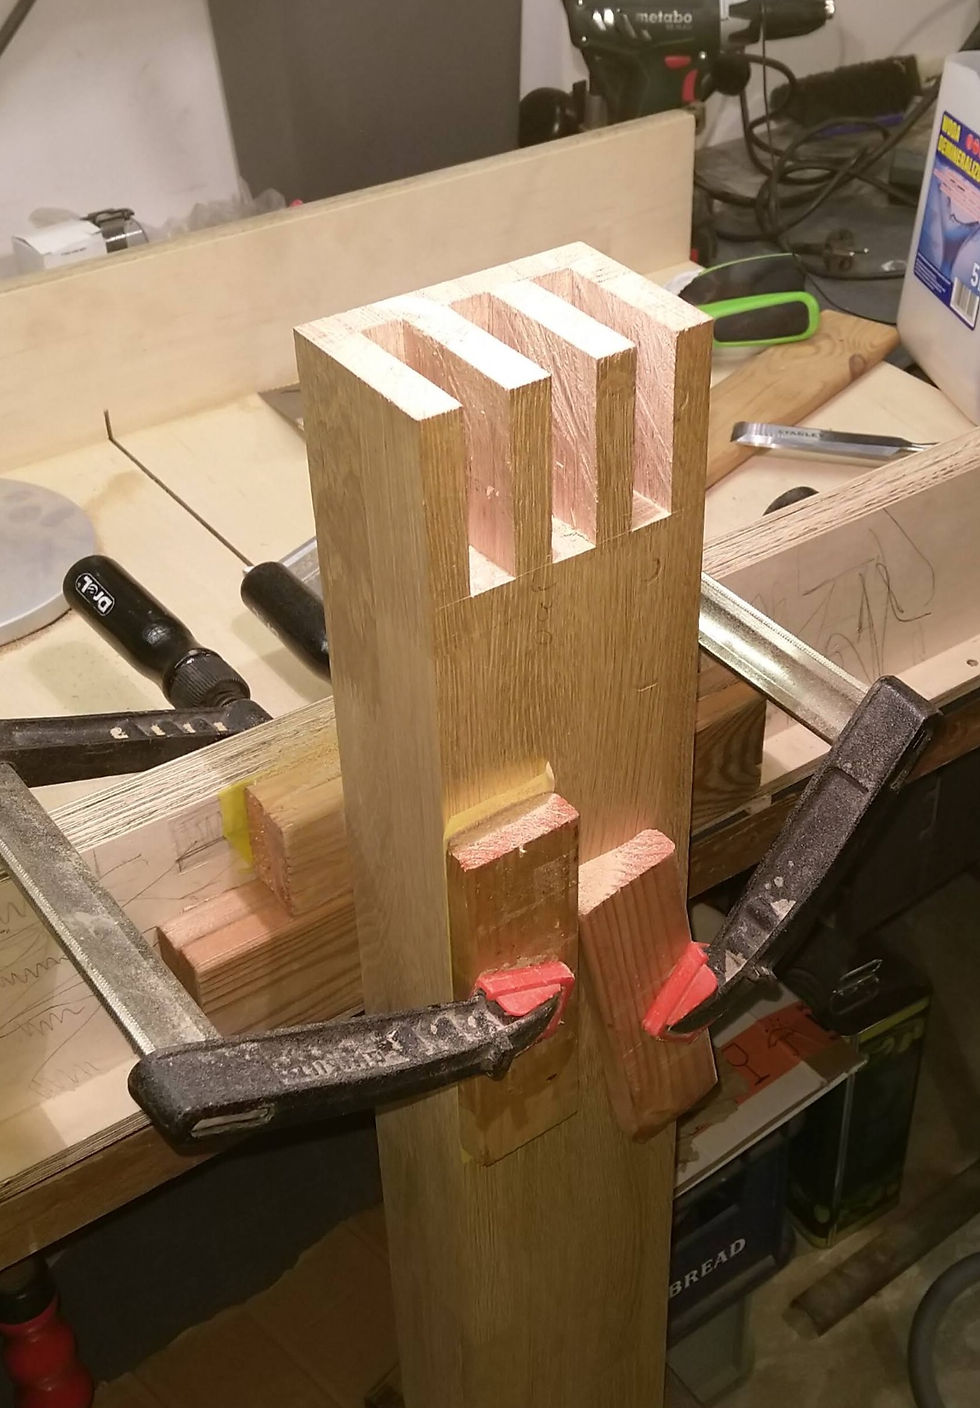
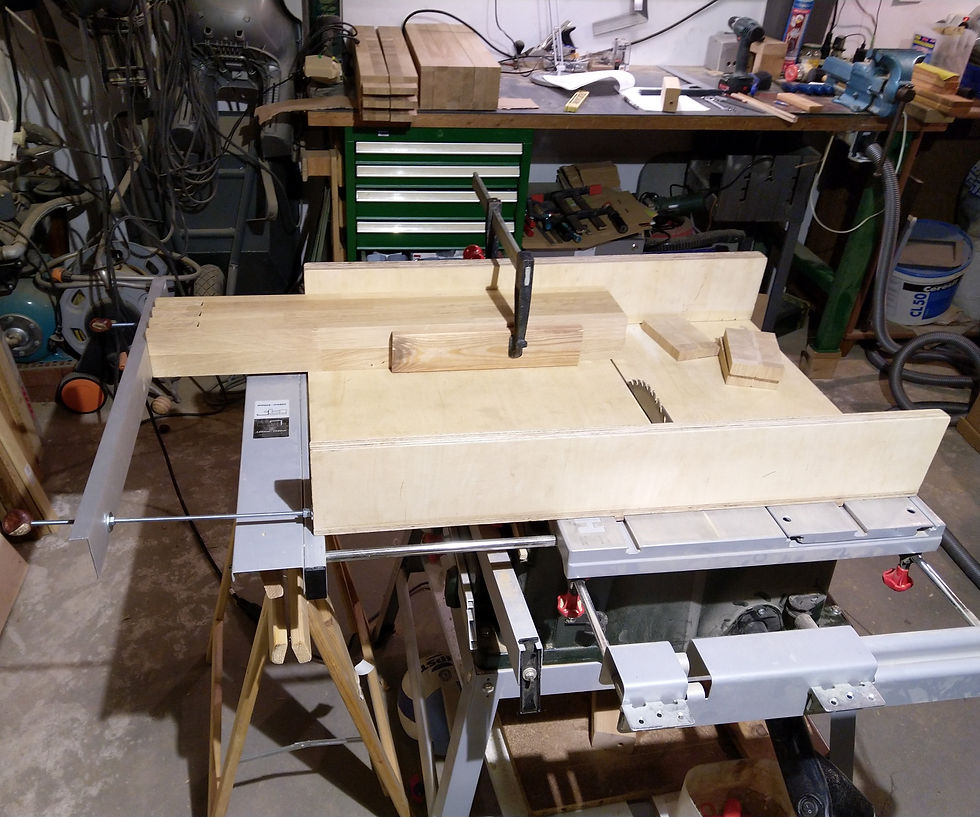
Once I had the first leg chiseled out I took to preparing the first set of teeth on a beam. These were easier to make as I could saw the teeth through to the bottom and only minimal chiseling was required. I used the special clamp I made to guide my saw to make straight cuts.
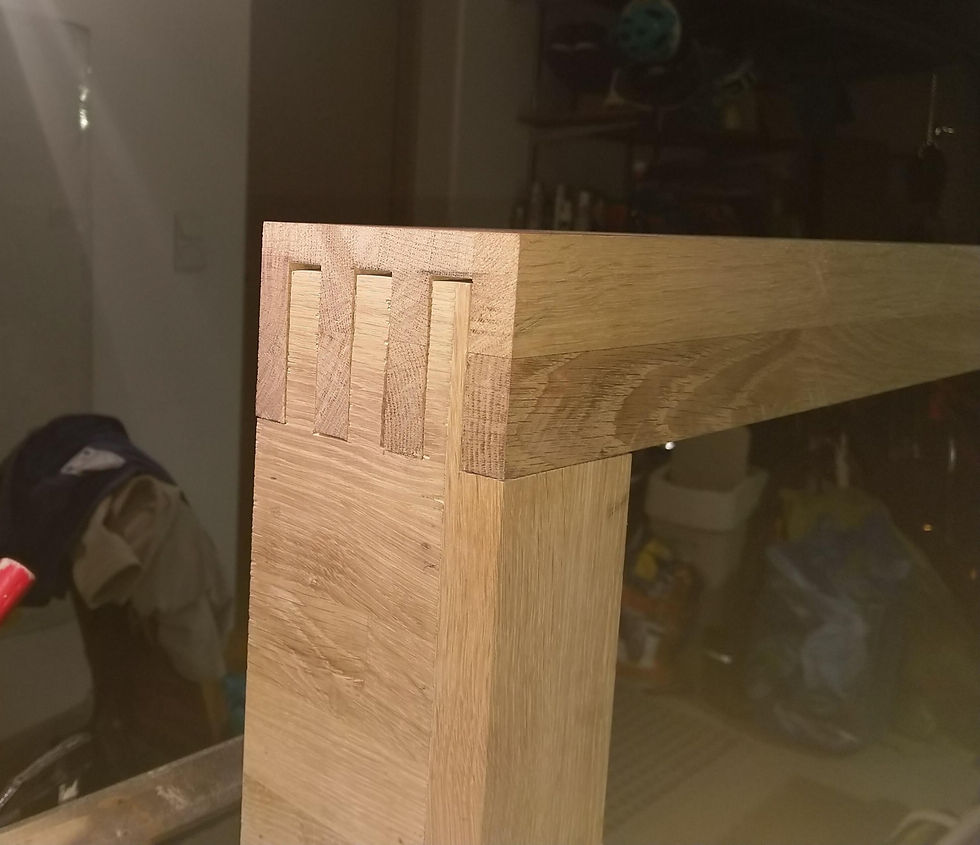
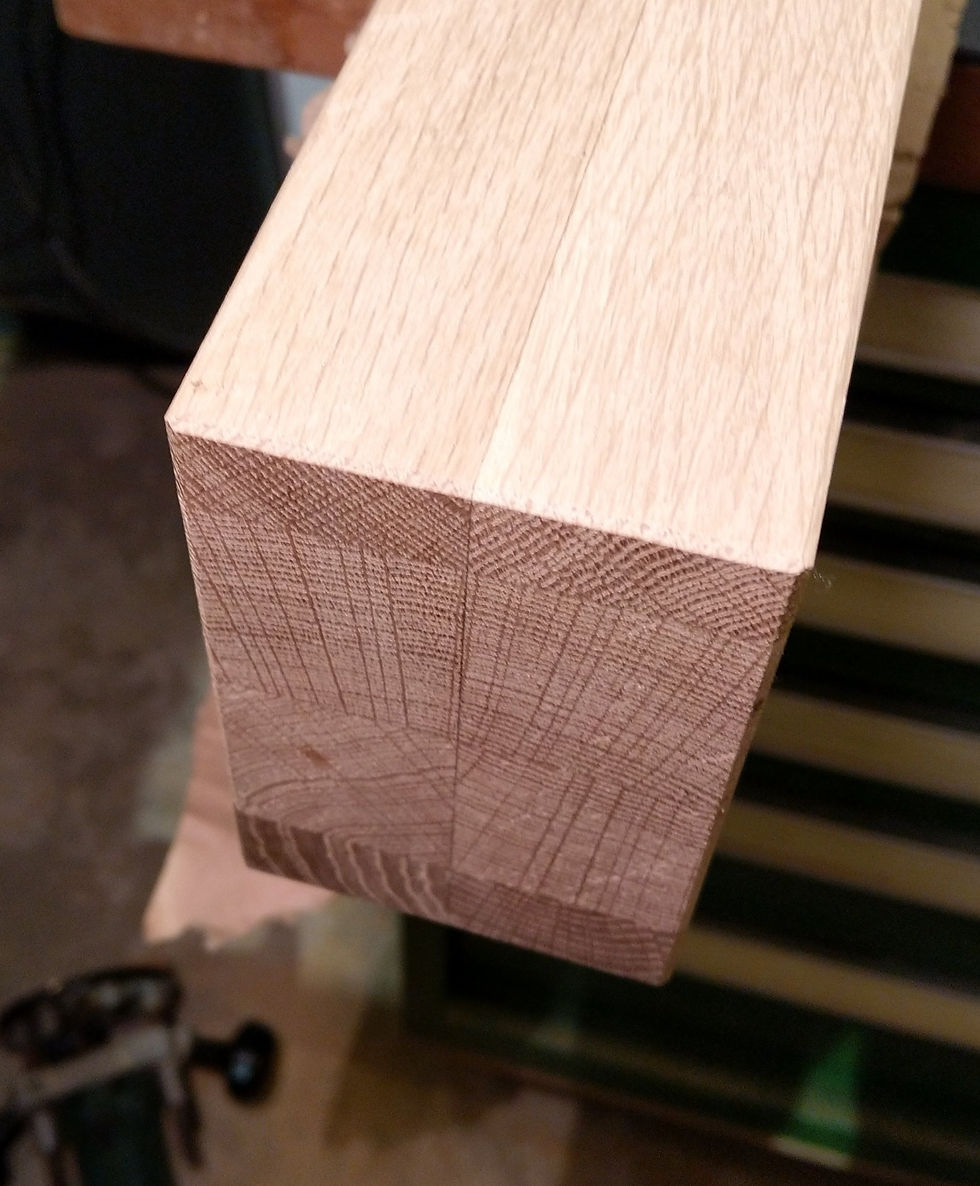
After the first set of grooves and teeth was ready I tried a dry fit... It didn't fit immediately but after a little bit of chiseling I was able to slide the groves over the teeth with a sufficient snug fit. You can check the result in the pictures below. Having never done something like this before, I was very happy with the result.

Now I just had to repeat all this 4 times...
An eternity later all grooves and teeth were ready and I took to cutting the 4 legs to the exact same length.

Now I was ready to assemble the legs. I checked if one corner of my workbench was square and bolted a wooden beam to each side. These would serve as a template to glue the legs and beams together in a perfect 90 degree angle.

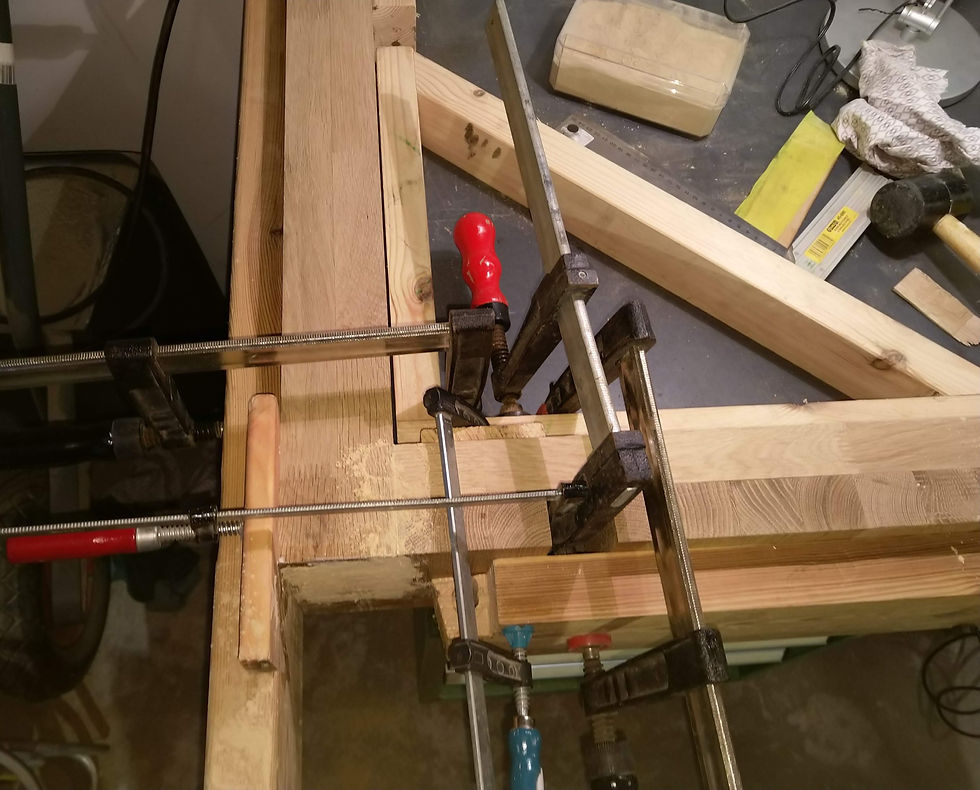
I didn't have long enough clamps to press the beams in the legs so I clamped a big wooden square to the horizontal beam and pulled on the square with a shorter clamp to squeeze the beam into the leg. It looks complicated on the picture put it worked great!
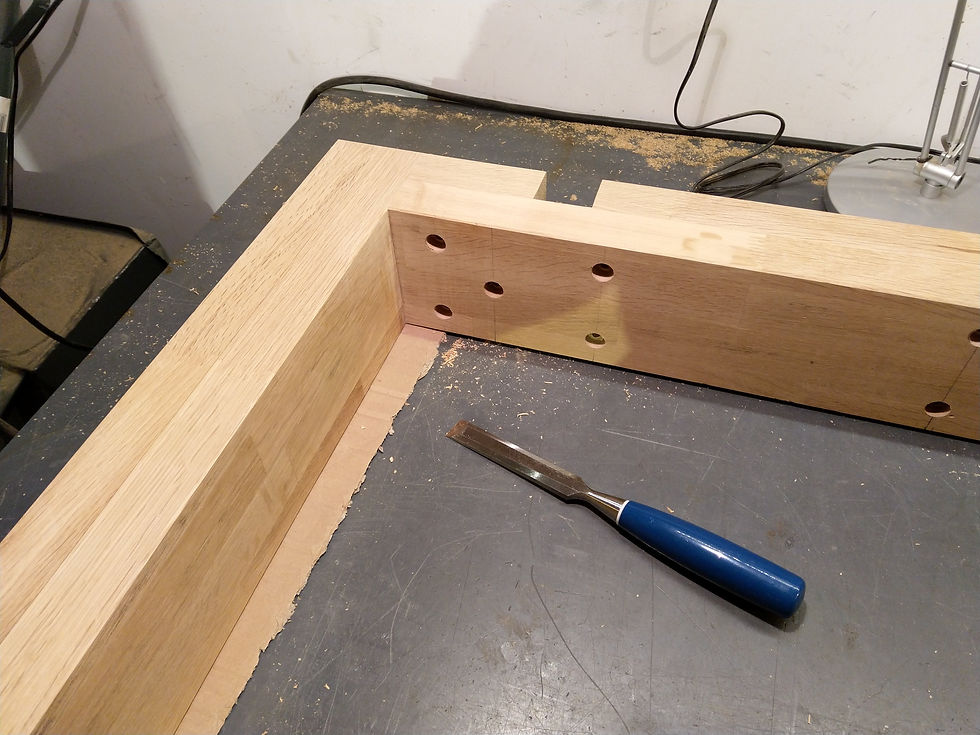
Once the legs were glued I prepared the assembly method for the table top and the legs. I decided to screw inserts in the tabletop and bolt the legs to the table top with 8mm allen bolts. This way, when wanted, they could be easily detached again. I wanted the legs and the top to reinforce each other mutually in regards to the extension beams which would be slid in slots in the legs so I made sure to put in enough bolts.


Given the number of bolts, it was important to assure that they would perfectly align when assembling. Here are the steps I followed to guarantee this:

1. Drilling 16mm countersunk holes for the allen bolt's head in the legs.
2. Drilling through the legs with an 8mm drill
3. Clamped the legs to the upside down table top
4. Marked the location of the inserts on the tabletop through the legs with an 8mm drill
5. Drilled out the holes for the inserts with a 10.5mm drill

6. Countersunk the holes for the inserts
7. Screwed in the inserts
8. Redrilled all the holes in the legs with a 10mm drill to give some some room for play when assembling.
(thanks to Woodsmith for providing the ideas for the jigs: https://www.woodsmith.com)
When I completed the inserts for the leg mountings I fitted the legs to the upside down table top to test. All fitted perfect.
All was now ready for the finishing touches but unfortunately I made a few light scratches and dents in the table top during the building process. Luckily I came across a method to wet the damaged parts with water and then heat them shortly with a steam iron. This solution really was a life saver! I was able to remove all damages. (This video at 12:44 shows this process: https://www.youtube.com/watch?v=k-TWPlUI2jM)
When all the damages were removed I extensively grinded everything. First with 120 grit and afterwards with 240 grit paper. Then I gave all the edges of the top and the legs a slight chamfer with a router and finished the inside corners with a chisel. Finally I sanded all again with 240 grit paper.
I decided I wanted to protect the table with a very durable wood finish. Osmo Polyx-Oil Original can be used for floors and kitchen tops so I expect it to be highly scratch resistant. It also seals the wood so it is water resistant. I also found that it is quite easy in its application. It applies like an oil but it hardens like a varnish. For the color/finish I took a clear matt finish (code 3062). I think that on a matt finish the usage traces which will appear over time will be less notable than on a glossy finish. An additional plus of this finish is that, according to the datasheet, when renovating or recoating a surface already covered with the oil, a clean and dry surface is sufficient. So no need to sand the table back to the bare wood. Final advantage is that the finish doesn't require any special products to maintain it. We usually clean it with a damp cloth and some soap.
After applying this finish on multiple projects and having it on our table for 3 years now, I can really recommend this product.
The oil has different names in different languages but via its product code you should be able to find it in your area.
To prepare the table for applying the finish I firstly vacuumed it carefully and afterwards I cleaned everything with a microfiber cloth and some acetone. I applied the finish with a microfiber roller and about 9 hours later I applied a second coat. I let it cure for a couple of days before doing the final assembly of the table.


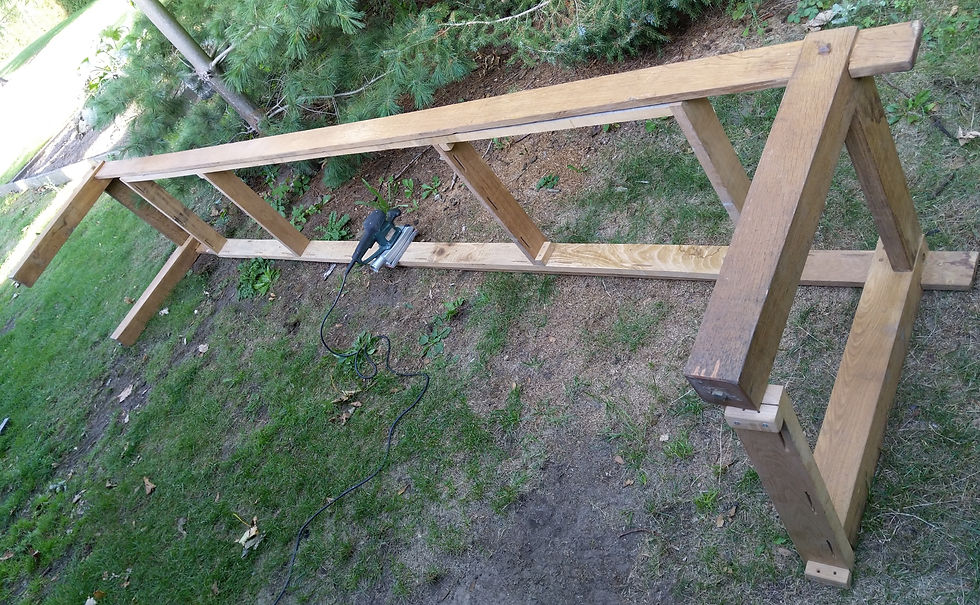
To assemble the table I put the top on two sawhorses. With some wooden blocks I made sure that the top was a little more than the height of the legs above the ground. Before mounting the legs I cut some felt pads to size from a big sheet and glued them to the bottom of the legs. I then slid the legs under the top and lightly screwed them to the top. I removed the saw horses and when the table was resting on it's feet I tightened all the screws...
I slid in the support beams for the extensions and put on the extensions. In the end the extensions became 67cm long instead of the planned 60cm. The boards I glued up and from which I was planning to cut the extensions and parts for the beams were a little longer than they needed to be. Instead of throwing away the excess wood I preferred to make the extensions a little longer. So in this configuration the table is 374cm long. Sufficient to sit 14 persons comfortably.

The support beams for the extensions are slid into slots which I made into the beams of the legs. As we only install the extensions a few times a year, I just put the extensions on top of the beams and fix them to the support beams with a screw from below. I have a solution with some slots so they can just be slid into place but I didn't have the need nor the time yet to implement it.


When we don't use the extensions we store them
against the wall of a small storage space under the stairs. I made a some brackets and supports against the wall to store the parts conveniently. When the extensions are not used, the holes in the beams of the table are filled up with some blocks to make them look nice.

Let me check back on the list of requirements I set out at the start of this project:
1. Solid? Yes, the legs and top behave as one part, the table is not wobbly at all. And what about the 4cm top? Well, I (90 kg :-)) can stand on it in the middle and it does not crack.
2. Easy in daily use and easy to clean? Yes. It has a plain table top and has a maintenance free easy to clean high quality finish.
3. Shine by simplicity? For me it does.
4. Sit 10 to 14 persons? Affirmative.
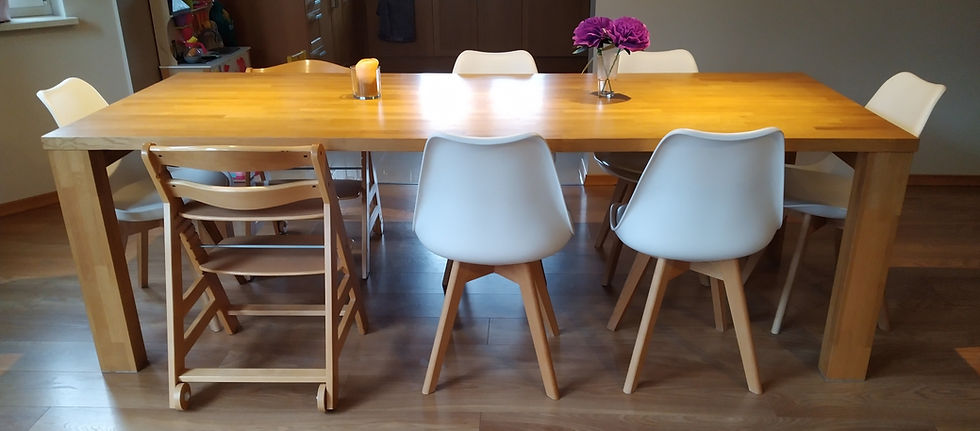
This table really has become the centerpiece of our daily life. It is big enough so we can play a game or do some crafting at one side without the need to clean everything when we eat. And when we have more guests we can sit them without too much hassle.


Comments