CUTTING BOARD REVIVAL !!!
- The Most Versatile HandyMan
- Feb 19, 2023
- 3 min read
Updated: Mar 24, 2023
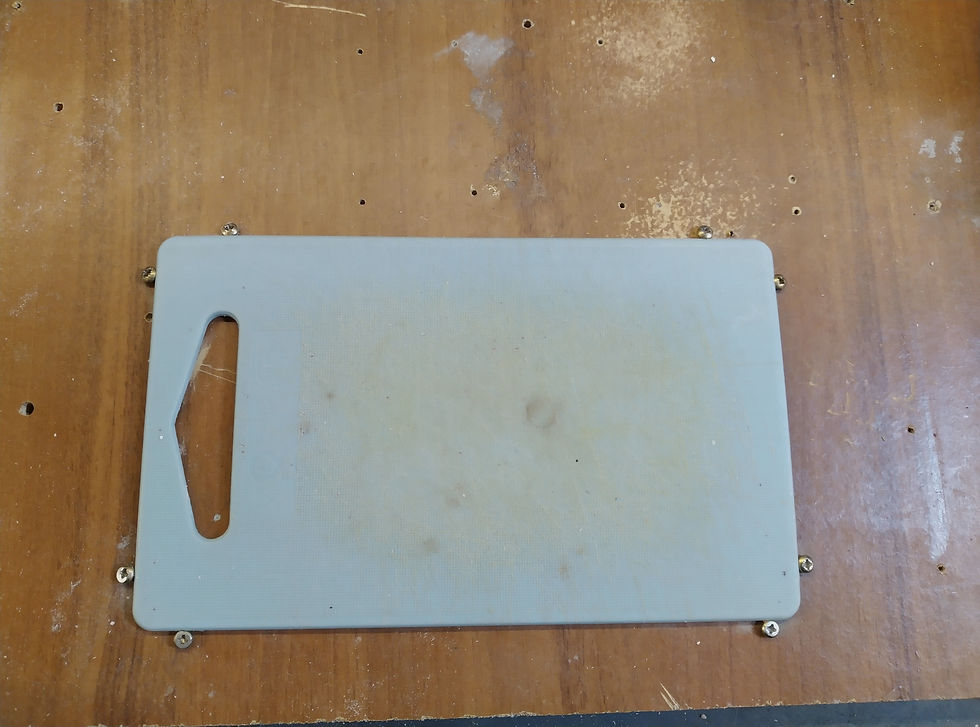
Some of our plastic cutting boards were starting to look really nasty. For a while already I had been thinking about how to clean them. I had kind of ruled out sanding them because I was afraid that the plastic would melt and clog up the sanding pad. I was all the time thinking that I would need to use a plane to revive the boards and as I am no expert with a plane, I wasn’t looking very much forward to it so I was kind of putting it of.


Finally I decided to tackle reviving the boards or just buy new ones. When browsing the web to get some ideas to get started I learned quite quickly that the cutting boards are made of polyethylene and that a lot of people are just sanding them down without problems.
I also came across this website which really has a lot of useful information regarding cutting boards in a condensed article. Most things seem obvious but I found reading through it really informative.
Reading it makes me want to make an end grain cutting board myself somewhere in the future.
So, back to our cutting boards. I used a few screws to pinch one of them in place on a scrap piece of wood and started sanding. As advised on the web I started sanding with coarse sanding paper (80 grit) and, just as in my woodworking projects, followed up with 120 grit and ended with 240 grit paper. The result was very satisfactory, I was able to remove all scratches and make them look even again. So I used the same technique to grind the other two boards with the same results.

As you can see on the pictures, two of the boards had silicone edges to make them less slippery on a worktop. The silicon was really damaged and the only option was to remove it completely.

One side these silicone edged boards also had some oddly shaped juice groove. For a moment I was considering making some template to cut off the silicone edges with a router in the shape of the juice groove (with a band saw I could have eye-balled it though). Luckily I stopped myself in time making this too complicated and I just cut off the silicone edges with a table saw, completely ignoring the juice groove. Keep it simple!

One side of the boards has a very strange looking juive groove now :-) Anyhow, next time I will need to revive/sand the boards again, the groove will probably be completely sanded away, so why bother.
To finish, I rounded off the edges of the cut boards and I gave the boards a renewed final sanding with 240 grit paper.

I am really happy with the result, they look like new ones again. I will surely be sanding them down more frequently to avoid them becoming so nasty again.
It is really nice that with this solution we are able to prolong the life of a cutting board. If I use this technique on the other boards we have, I think they will last us for a very long time. Potentially avoiding a lot of garbage. On the other hand, knowing what I know now, if we would ever need to buy a new board again, I would probably buy a wood or bamboo one.


Comments